English
Set up your shop in 10 minutes
Five steps, in this order, and your first product can go live. If you joined through an onboarding form, some of them were asked there already: check them in Settings.
1. Complete your profile
Settings > Vendor page: your name, logo, description and whatever your marketplace asks for. This is your page on the marketplace, what customers read before they buy. Some marketplaces fill it for you and hide the tab.
2. Add your payout method
Settings > Payouts: connect the account your sales are paid to. A dot on the tab means it is not done yet, and nothing can be paid to you until it is. See Add your payout method.
3. Set your shipping rates
Settings > Shipping: a rate for each country you ship to. The step sellers miss most: a customer in a country with no rate cannot check out your products.
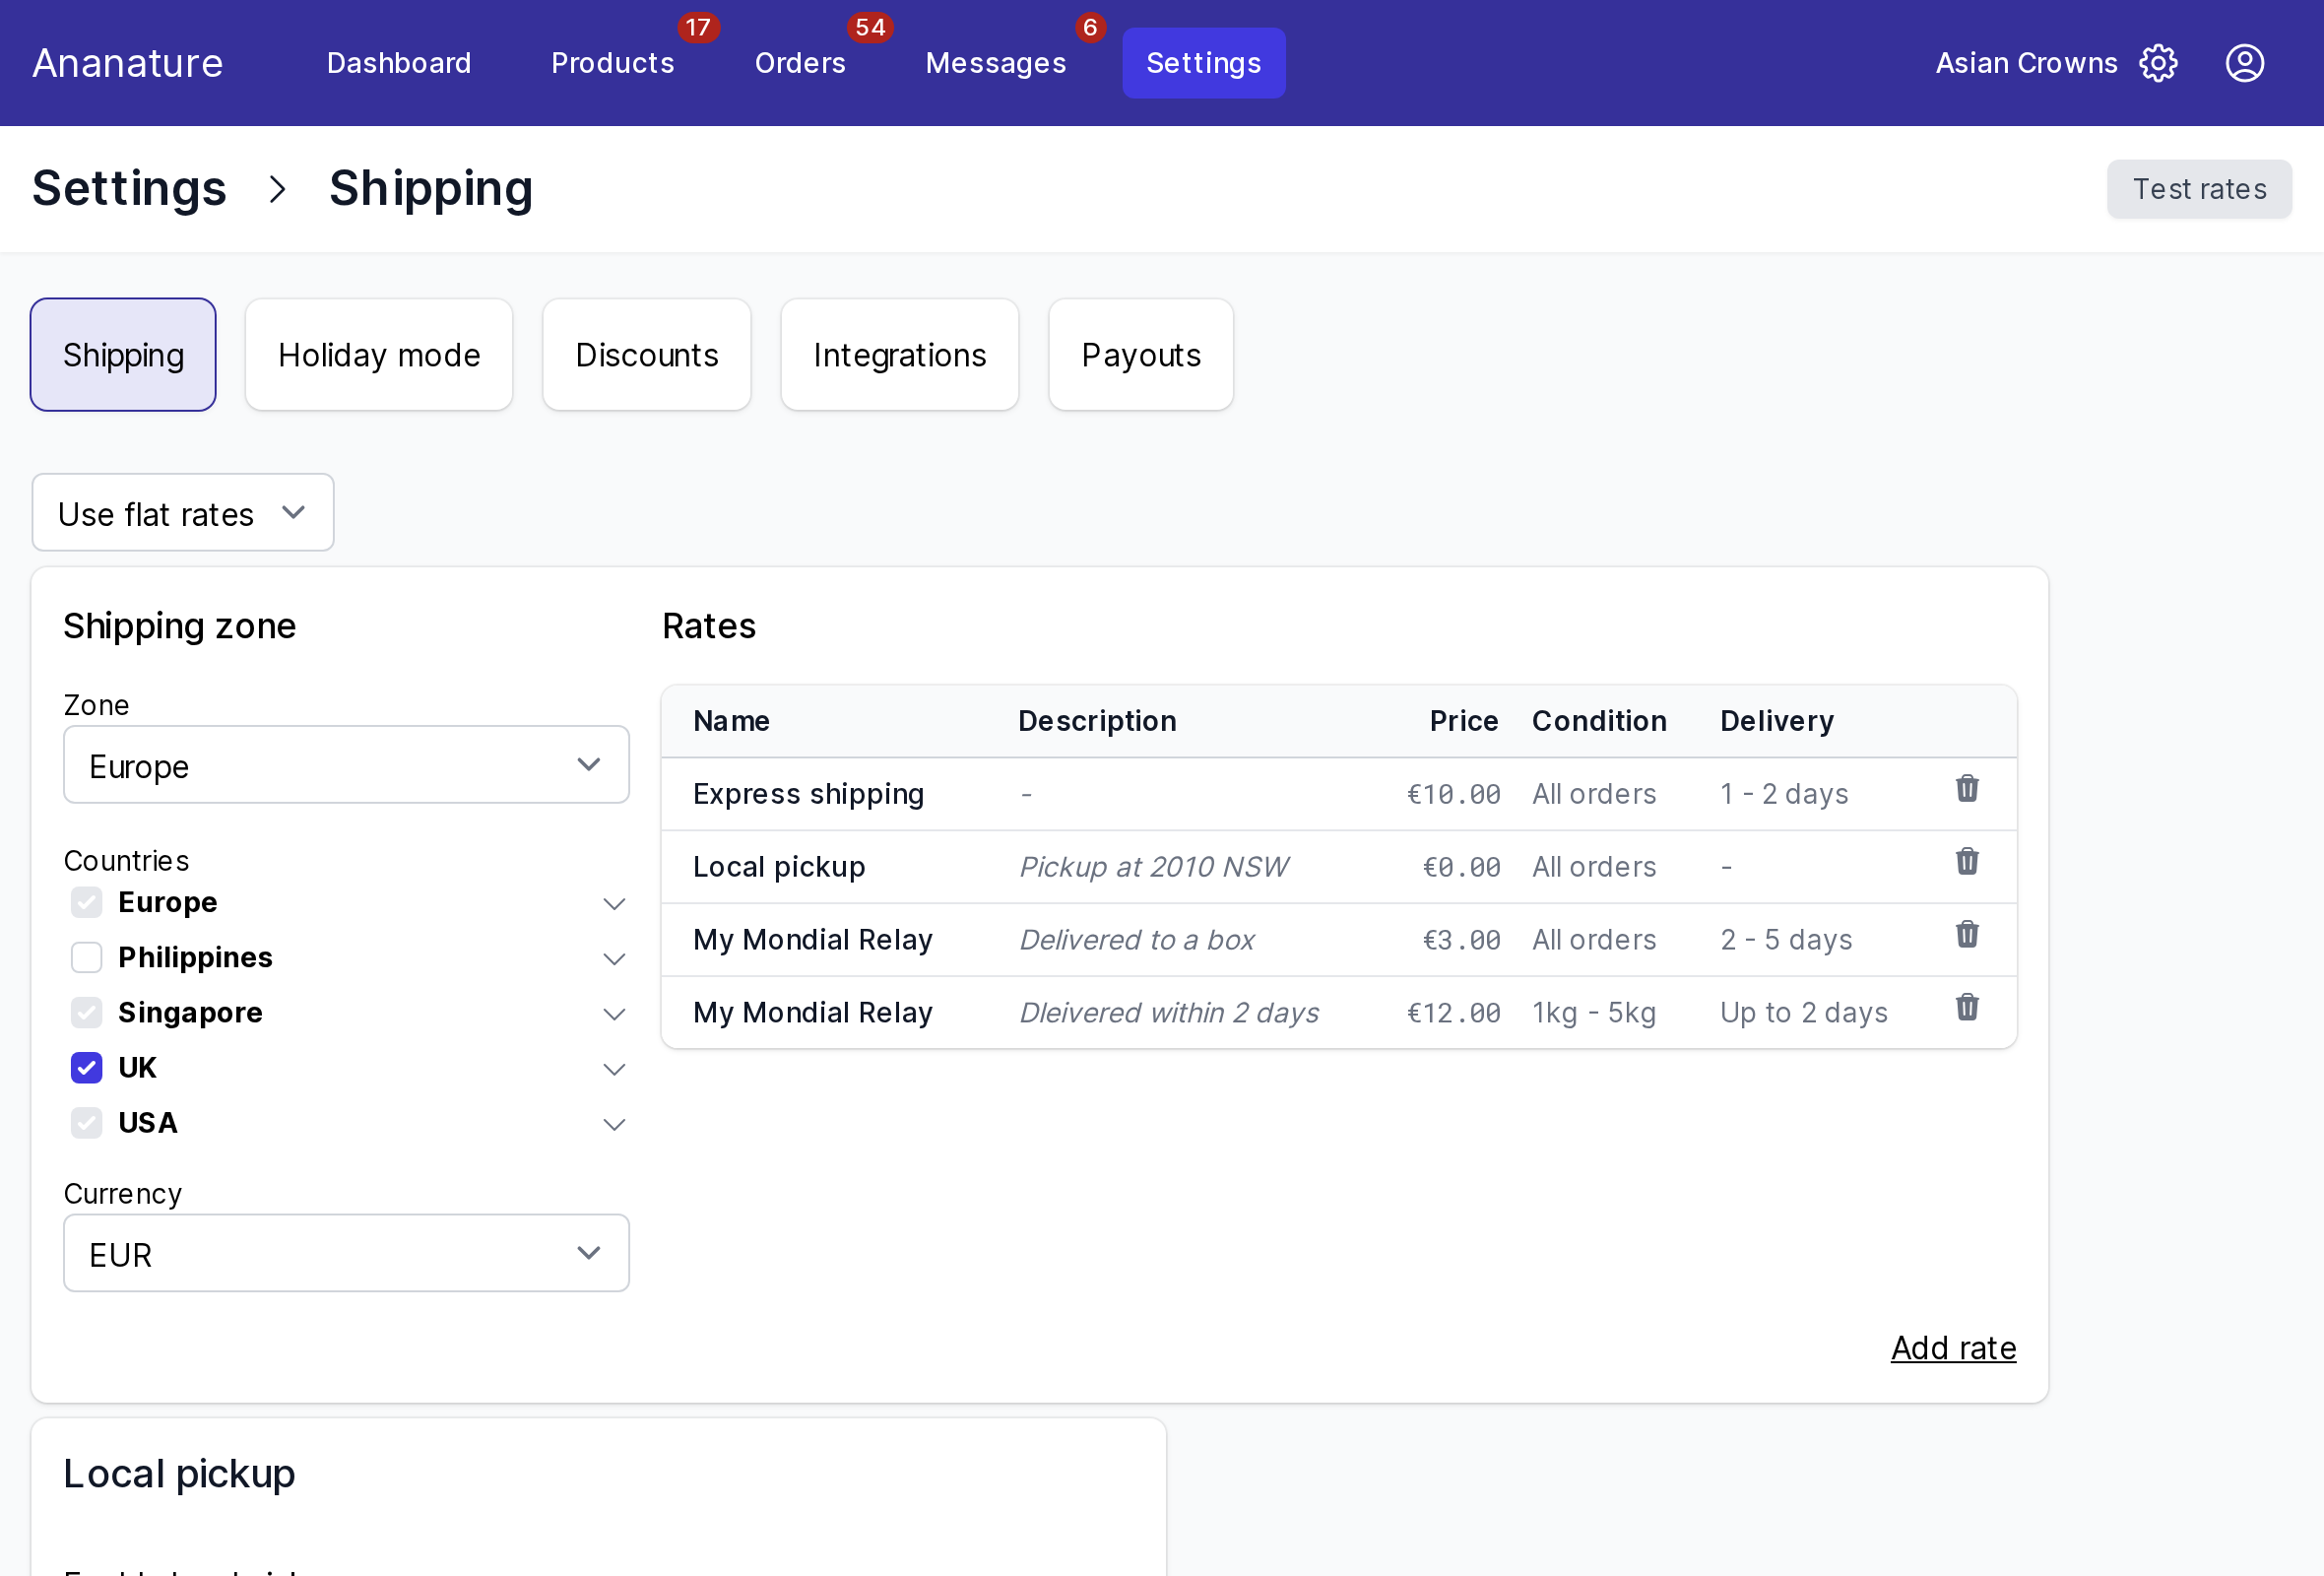
Pick the zone, tick its countries, then Add rate: a name such as Standard shipping, a price, and when it applies (all orders, under a cart value, under a weight). Add a free rate above a cart value if you offer free shipping. See Set your shipping rates for live rates, Shopify rates and local pickup.
4. Add your products
Three ways, from Products:
Add product, one by one: Add a productAdd product > Bulk product upload, from a CSV file- Or connect the store you already sell on, and your products import themselves: Connect your online store
5. Wait for approval
A new product is Pending until your marketplace approves it, then Live. Some marketplaces approve automatically. See Why is my product not on the marketplace?.
Then, when a customer buys: Fulfil an order.
Ask your marketplace
Its commission, when it pays, what it accepts for sale and what it expects of your photos and descriptions: these are its rules, on its seller page or in your welcome email.